Configuring AutoUpdate.
To
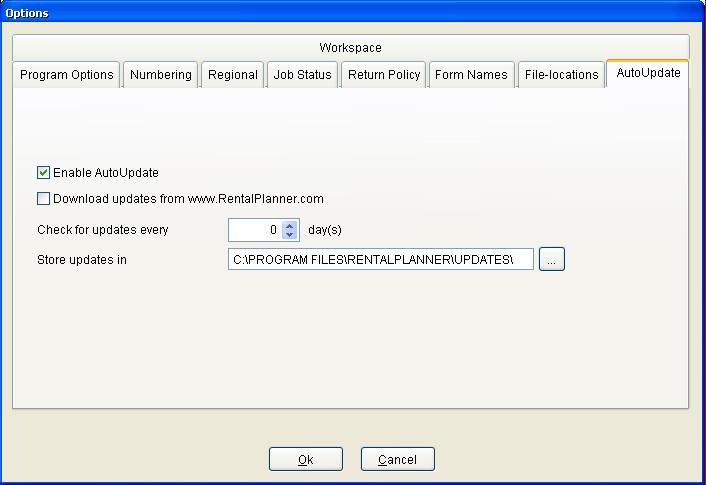
activate AutoUpdate, select Utilities-Options from the main menu, and click the
AutoUpdate tab.
Follow these steps:
- Tick the 'Enable AutoUpdate'
checkbox.
- On 1 workstation only, you
need to tick the 'Download updates from www.RentalPlanner.com'. The other
workstations will update from a network-folder (see below)
- Set the checking-interval
(30 days is a recommended value)
- Select a folder where the
updates should be stored. Default is a folder called 'updates', located one
level below the RentalPlanner-folder. E.g. if your data is stored in
\\myserver\RentalPlanner\RentalPlannerdata, the updates will be stored in
\\myserver\RentalPlanner\updates. The selected folder is created automatically if it
does not exist.
- Click 'OK'
The AutoUpdate-process is as
followes:
- For the workstation that
should download the update from our web-site (Download updates from
www.RentalPlanner.com' is checked):
Each time the interval expires, you are asked if you want to check for a new
update. If you answer 'Yes', an internet-connection is made and the program
checks for new updates. If an update is available, you are asked whether you
wish to download it now. After downloading, a copy of the update is stored in
the updates-folder, and the running copy of RentalPlanner is replaced with the update.
- For all other
workstations:
Each time RentalPlanner is started, AutoUpdate checks if a new update is stored in the
updates-folder. If so, you are asked if you want to replace the running copy
with the new update.
NOTE:
AutoUpdate uses a VB-script to replace the running copy with the update. Some
anti-virus programs display a warning when a VB-script starts. If so, select
'Run the script once' from the anti-virus dialog.